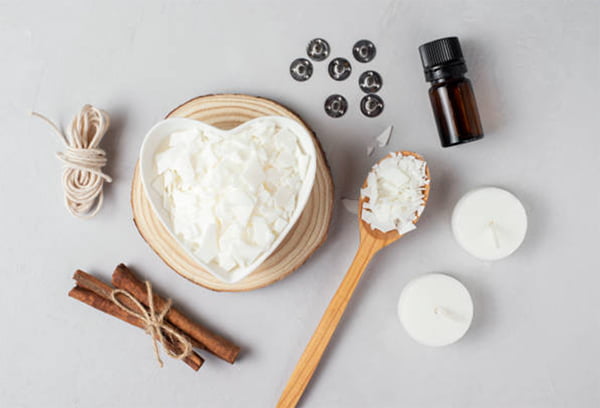
If you are a candle lover, you must try making beautiful DIY soy candles at home. The soy candle-making process is simple, so there's no reason you can't try your hand at making soy candles of your own! With a few basic supplies, you can make homemade soy candles. The beautiful candles make great home decor, Christmas gifts, and even birthday presents. Not to mention, they are so much fun to put together.
What You Will Need To DIY Soy Candles
Making your own candles in your kitchen is easier than you think. You don't need many ingredients or supplies to make soy candles, and you already have most of the tools on hand. It's also a good idea to cover your work area with a newspaper or some other covering.
Soy Wax
You can't make candles without wax, and there are various waxes to choose from, including paraffin, coconut, and beeswax. Soy wax is made from extracting oils from soybeans, which leaves a smaller environmental footprint than what goes into making paraffin wax from crude oil. Soy wax also burns cleaner and is less toxic to your air as the candle burns. Soy wax is also denser than paraffin wax, meaning that soy wax candles have a longer burn time. You can find pure soy wax flakes online or at a craft store.
Candle Wicks
Either cotton or wooden wicks will work for these soy candles. While wood wicks lend a distinctive look, cotton wicks can be easier to use. You will also need glue or tape to secure the wick to the bottom of the jar and a pair of scissors to trim the wick to the appropriate height.
Wick Holders
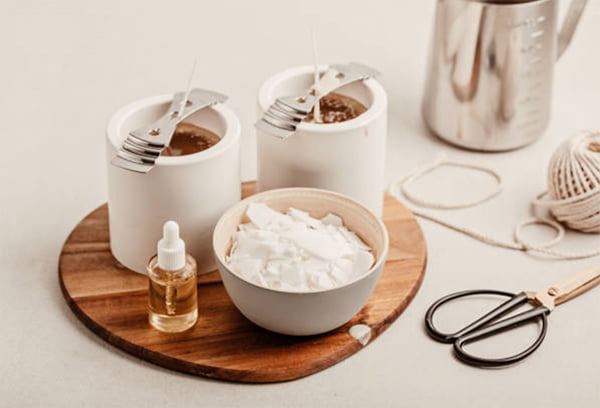
You will need wick holders to ensure your wick stays in place while you pour the hot wax. While you can purchase one from a craft store, many use something they already have at home, like clips, a pencil, or a stick.
Containers
You will need a glass jar or other containers to hold the melted wax to make your candle. Anything that can handle high temperatures works - glass mason jars, ceramic canisters, tea cups, even shells will work! This is a great opportunity to reuse old candle jars.
If your old jar has a bit of leftover wax left, you can still use it! To remove the old wax from the container, pop them in the freezer. The old wax will contract and loosen from the sides of the jar, making it easy to pop out.
Essential Oils
These are not required, but if you would like your scented candles, you will need a couple of drops of the essential oil of your choosing. Add in a few drops of essential oil to make your candle scented and stir in after the wax melts.
If you don't have essential oils at home, you can add extract instead. For example, you can add vanilla extract.
Heat-Safe Container
This container is for melting the wax. A typical pot is ample if you'd like to melt the wax on the stove, and a double boiler is best. If you'd rather use the microwave to melt down the wax, a deep Pyrex dish will work.

How To DIY Soy Wax Candles
Now that we got all the supplies together let's start making candles!
Attach The Wicks
The first step is to add the wicks to your glass containers or mason jars. You'll measure how tall your wicks need to be by holding it next to your container and cutting it a few inches taller than the rim. You can trim the wick further after making the candle.
Then, attach the wicks to the center bottom of the container using either glue or a loop of tape. Avoid using hot glue! When you pour the hot wax into the container later, the glue from a hot glue gun will melt and rise to the top.
Some packages of wicks will have metal bases on the bottom of the wicks to give you a wider area to secure to the bottom of the jar. To help the wick stay taut and centered, wrap the excess inches around a skewer or pencil, and then lay the skewer across the top of the container.
Melt The Soy Wax
Melting the appropriate amount of wax, you'll first need to know how much liquid your containers hold. One cup of melted wax will require two cups of wax flakes.
There are three easy methods you can use to melt the wax:
1. You can melt them directly in a pot set to medium heat on the stove.
2. You can use a double boiler, which allows the boiling water in the bottom pot or saucepan to melt the wax flakes evenly in the top pot.
3. You can melt the wax in the microwave. Pour the flakes into a heat-safe dish and microwave them for 1 minute at a time. Give them a good stir in between each minute. Use an oven mitt to handle the glass dish when you pull it out to stir - it gets hot, fast! Using a stirrer that can be disposed of afterward, like a popsicle stick, will save you time in cleaning up later.
Scent The Soy Wax
If you'd like to add scent to your candle, this is the time to add your fragrance oil. It's best to use essential oils rather than artificial fragrance oils, as they are less disruptive to human endocrine systems. You can mix your own scent by combining different essential oils. It's best to do this in a separate dish until you make a scent that you like. Add a few drops to your melted soy wax. How much oil you add is entirely up to you. Some people recommend 30-40 drops of essential oil for an 8oz candle or two teaspoons of essential oil for every 4oz candle.
Fancy it up
You can fancy your candle up by adding the following after you pour wax into a jar and before you let it set:
- Coloring: You can also add some food coloring to the wax at this stage to lightly color your candle.
- Flower petals: To fancy up your candle, you can add fresh flower petals into the melted wax. Press them on the side of the glass to give it a fancy look.
- Herbs and spices: Along with essential oil and extract, you can also add ground herbs and spices based on your personal preference. If you prefer adding herbs and spices essential oil, remember they have a strong scent that can permeate carrier oils.
Let It Set
Carefully pour the wax into your candle jars, being certain not to disturb the skewer holding the wick steady. Then, let the wax cool. This process takes about 12 hours. You'll find that the outside of the soy candles cool much faster than the inside, leading you to think the candles are finished cooling when they still have hours to go. If you put the container candles in the fridge to try to cool down the melted wax faster, you'll wind up with cracks in your candles. Once the wax has fully set, you can cut the wicks down to a normal length.

DIY Soy Candle Making Tips
When and how much essential oil to add?
It's best to stir essential oil into your melted wax at 175-185°F. This is the best temperature for oil to bind with soy wax regardless of the flashpoint properly. Otherwise, the scent can be affected.
For a more pungent candle, use the 9% rule. Add 1.5 ounces of fragrance per pound of wax. Remember, the scent is more potent in melted wax than it will when burning your candle.
How to fix the uneven top and any imperfection?
If your final candle has an uneven top or has any cracks or craters, you can fix the imperfection with a heat gun. Turn on your heat gun and turn your candle in a circular motion. Go around and around until the top has melted, and then let it reset. Avoid heating the wick.
How To Color Your Soy Candle?
You can use either a dye block or liquid dyes to color your soy candles. Dye blocks produce a more vibrant or darker color, and liquid dye produces lighter and more pastel shades of color.
How To Clean Up After DIY Your Soy Candles?
To clean up all the tools, do it while the wax is still in liquid form. Use a paper towel and wipe anything and everything before washing normally. Never pour liquid wax down the drain.
